 Equine


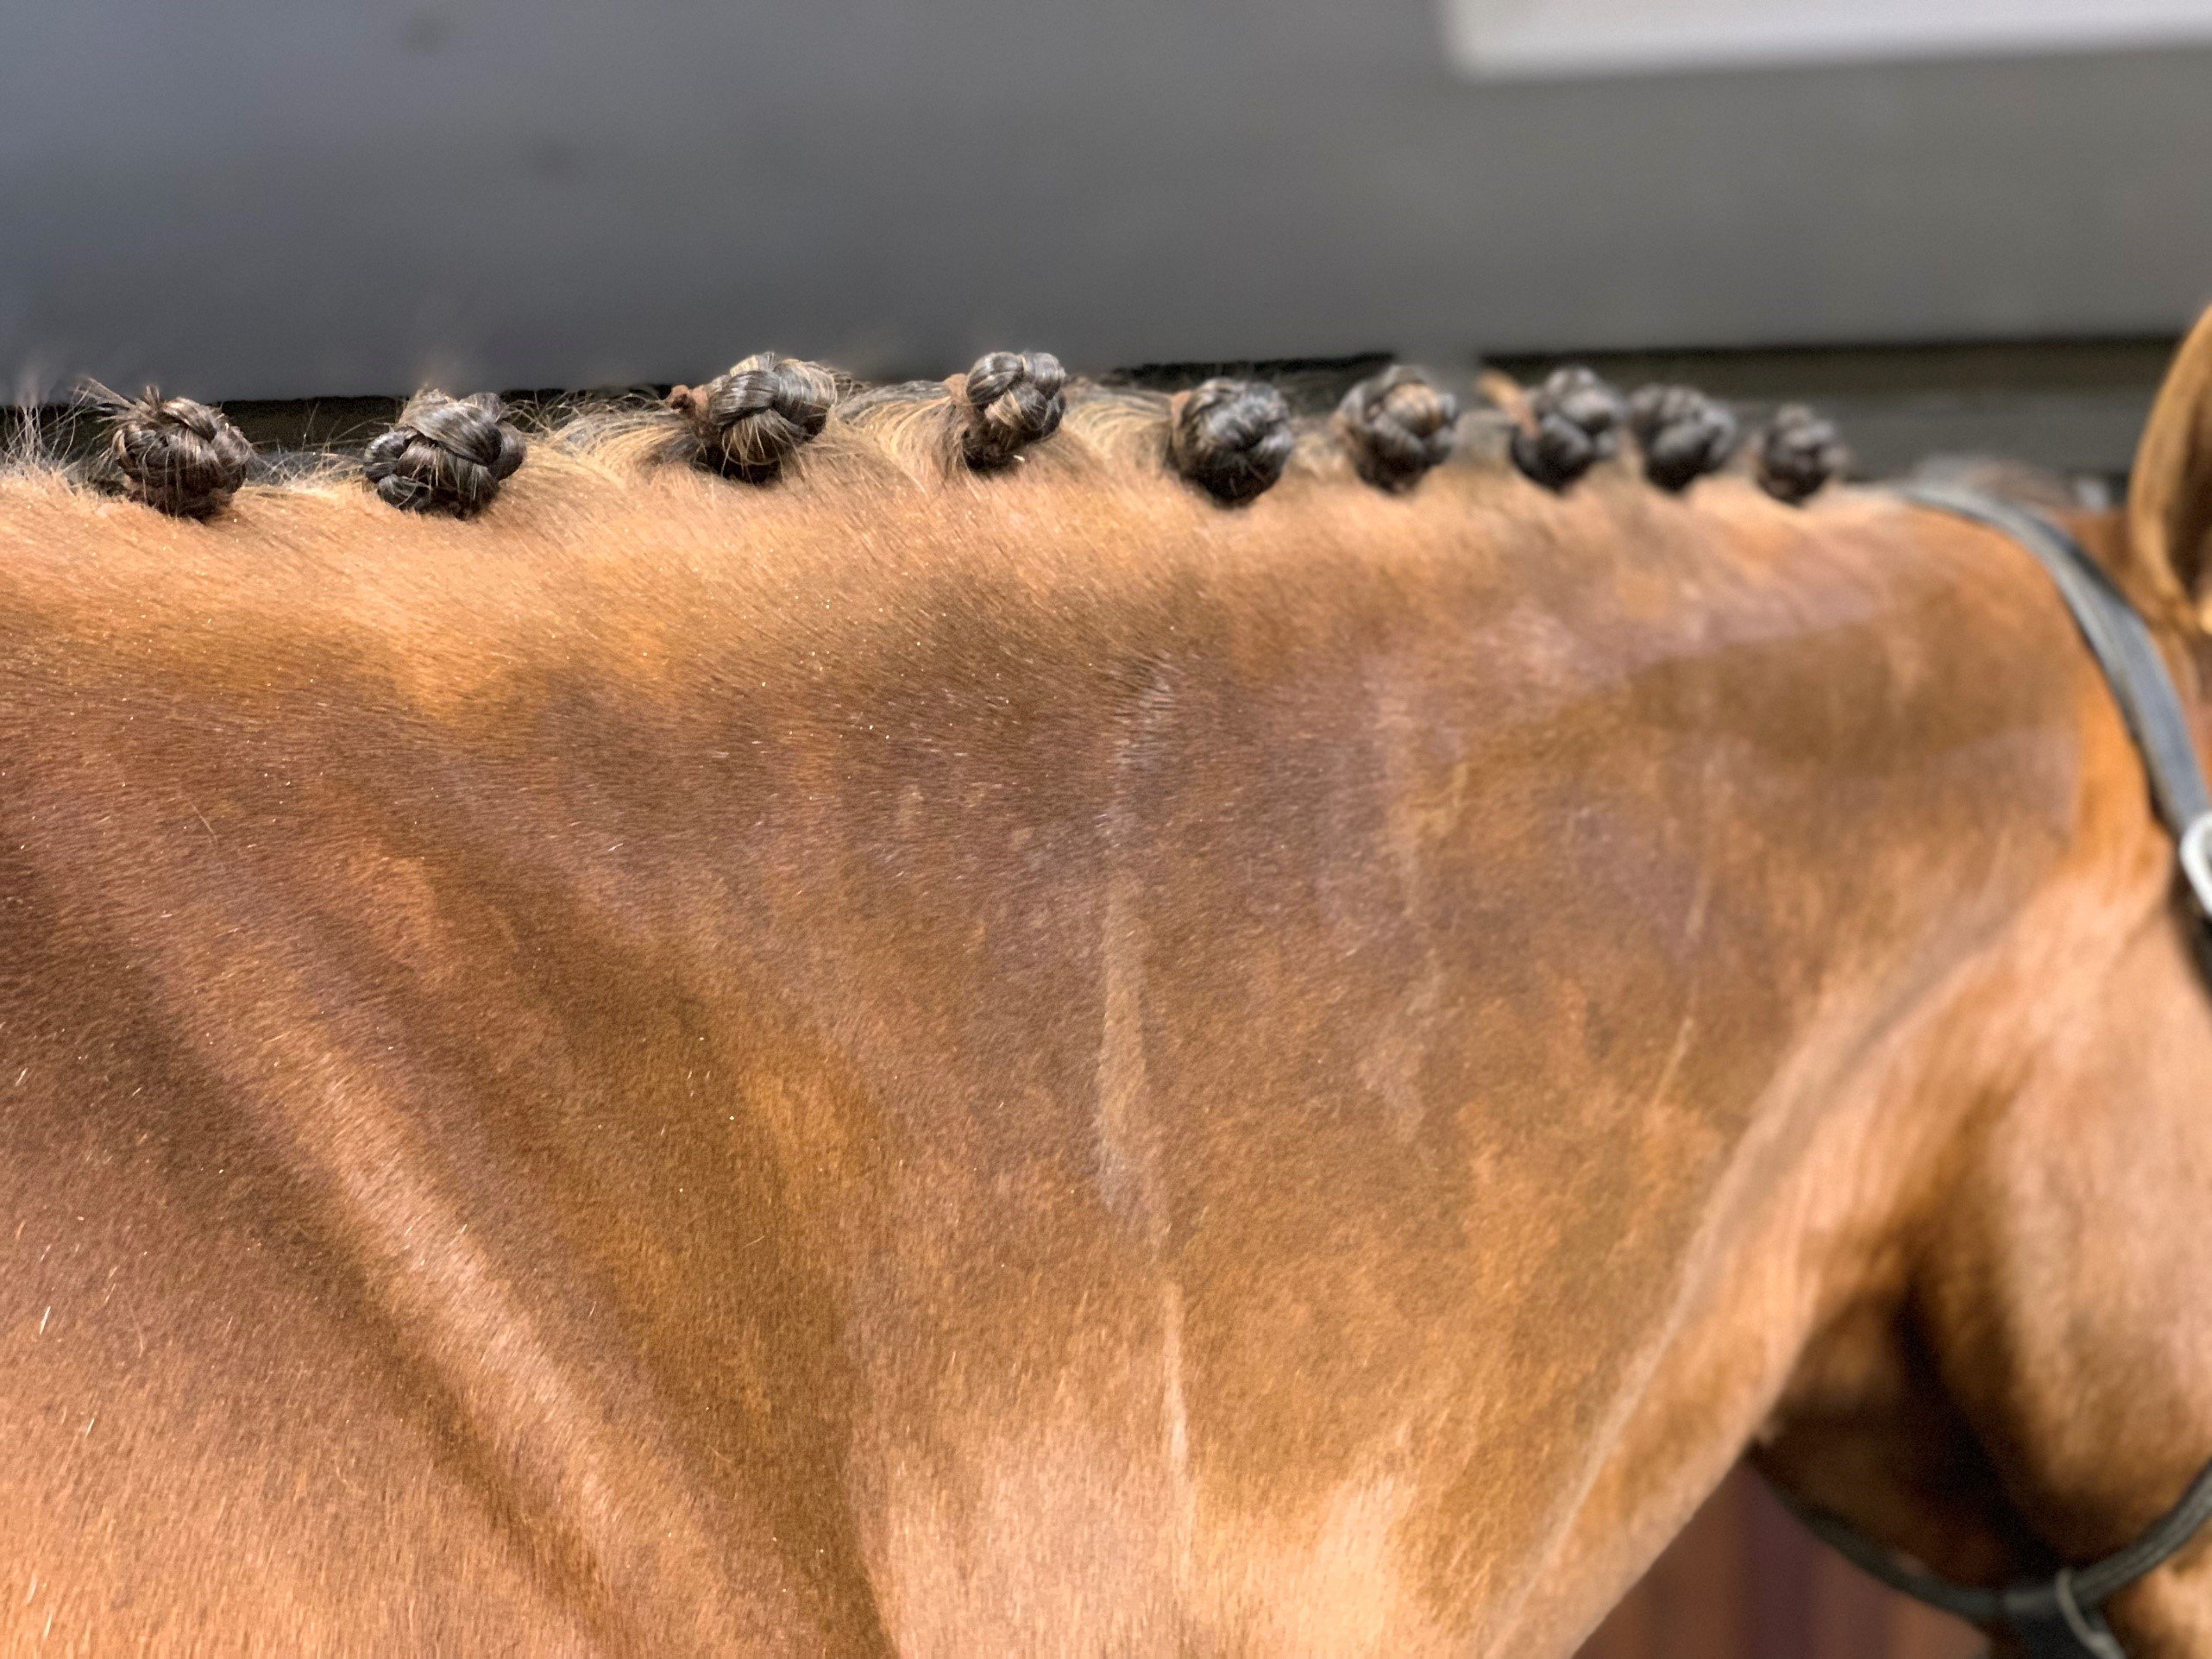
Button braids are commonly seen in the dressage ring among other beautiful styles that I will cover in future blog posts. Braiding your own horse doesn’t have to be a daunting task, just follow these step-by-step tips and practice, practice, practice!
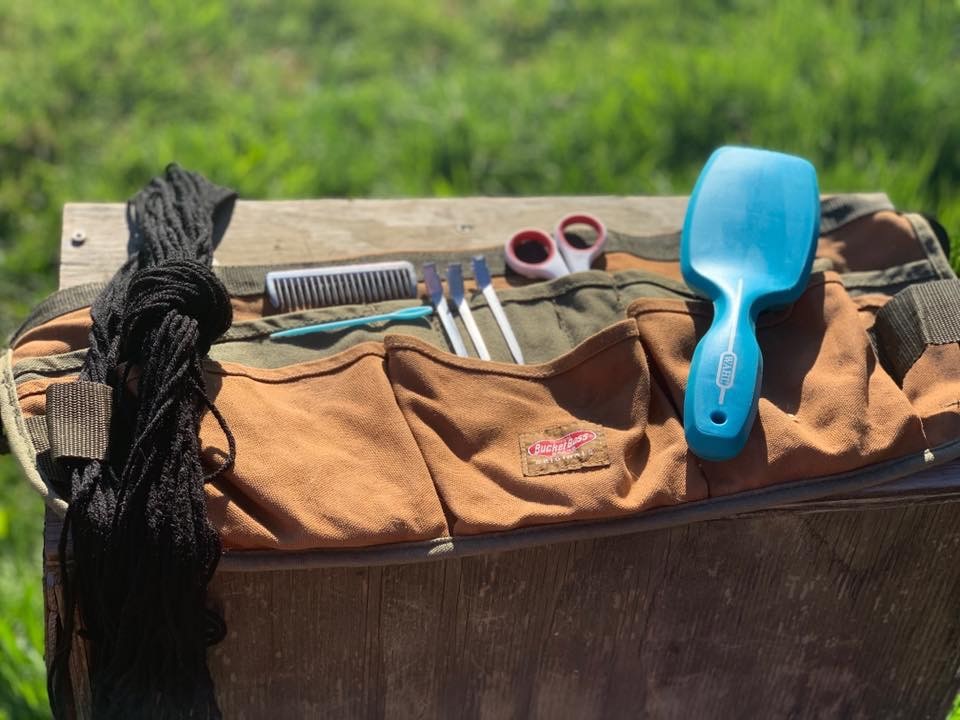
To start you will need to gather some tools:
Mane brush- Pulling comb
- Yarn cut to 12-16” lengths; 10-15 pieces
- Hair clips
- Spray bottle with water or braiding spray
- Scissors
- Step stool
- Large yarn needle (metal is best)
- Apron or tool belt
Step 1: Use your pulling comb to measure the width of your braids, and clip the excess hair off to the side. you can start at the poll or withers; typically, with horses that are not experienced being braided or a little head shy I will start at the withers and work my up to the poll. I make the width of my braids smaller at the ends (poll and withers) to give the illusion of a round neck, so the larger braids are in the middle of the neck, but the end braids not to be smaller the ¾ comb width. For thin manes I might go 1.5 comb width in the middle, with one comb width on the ends. I find this method is also helpful for the braids at the base of the neck where the rider’s hand touch, with the braids a little smaller and tighter they tend to stay in better and get less fuzzy over the course of a weekend.
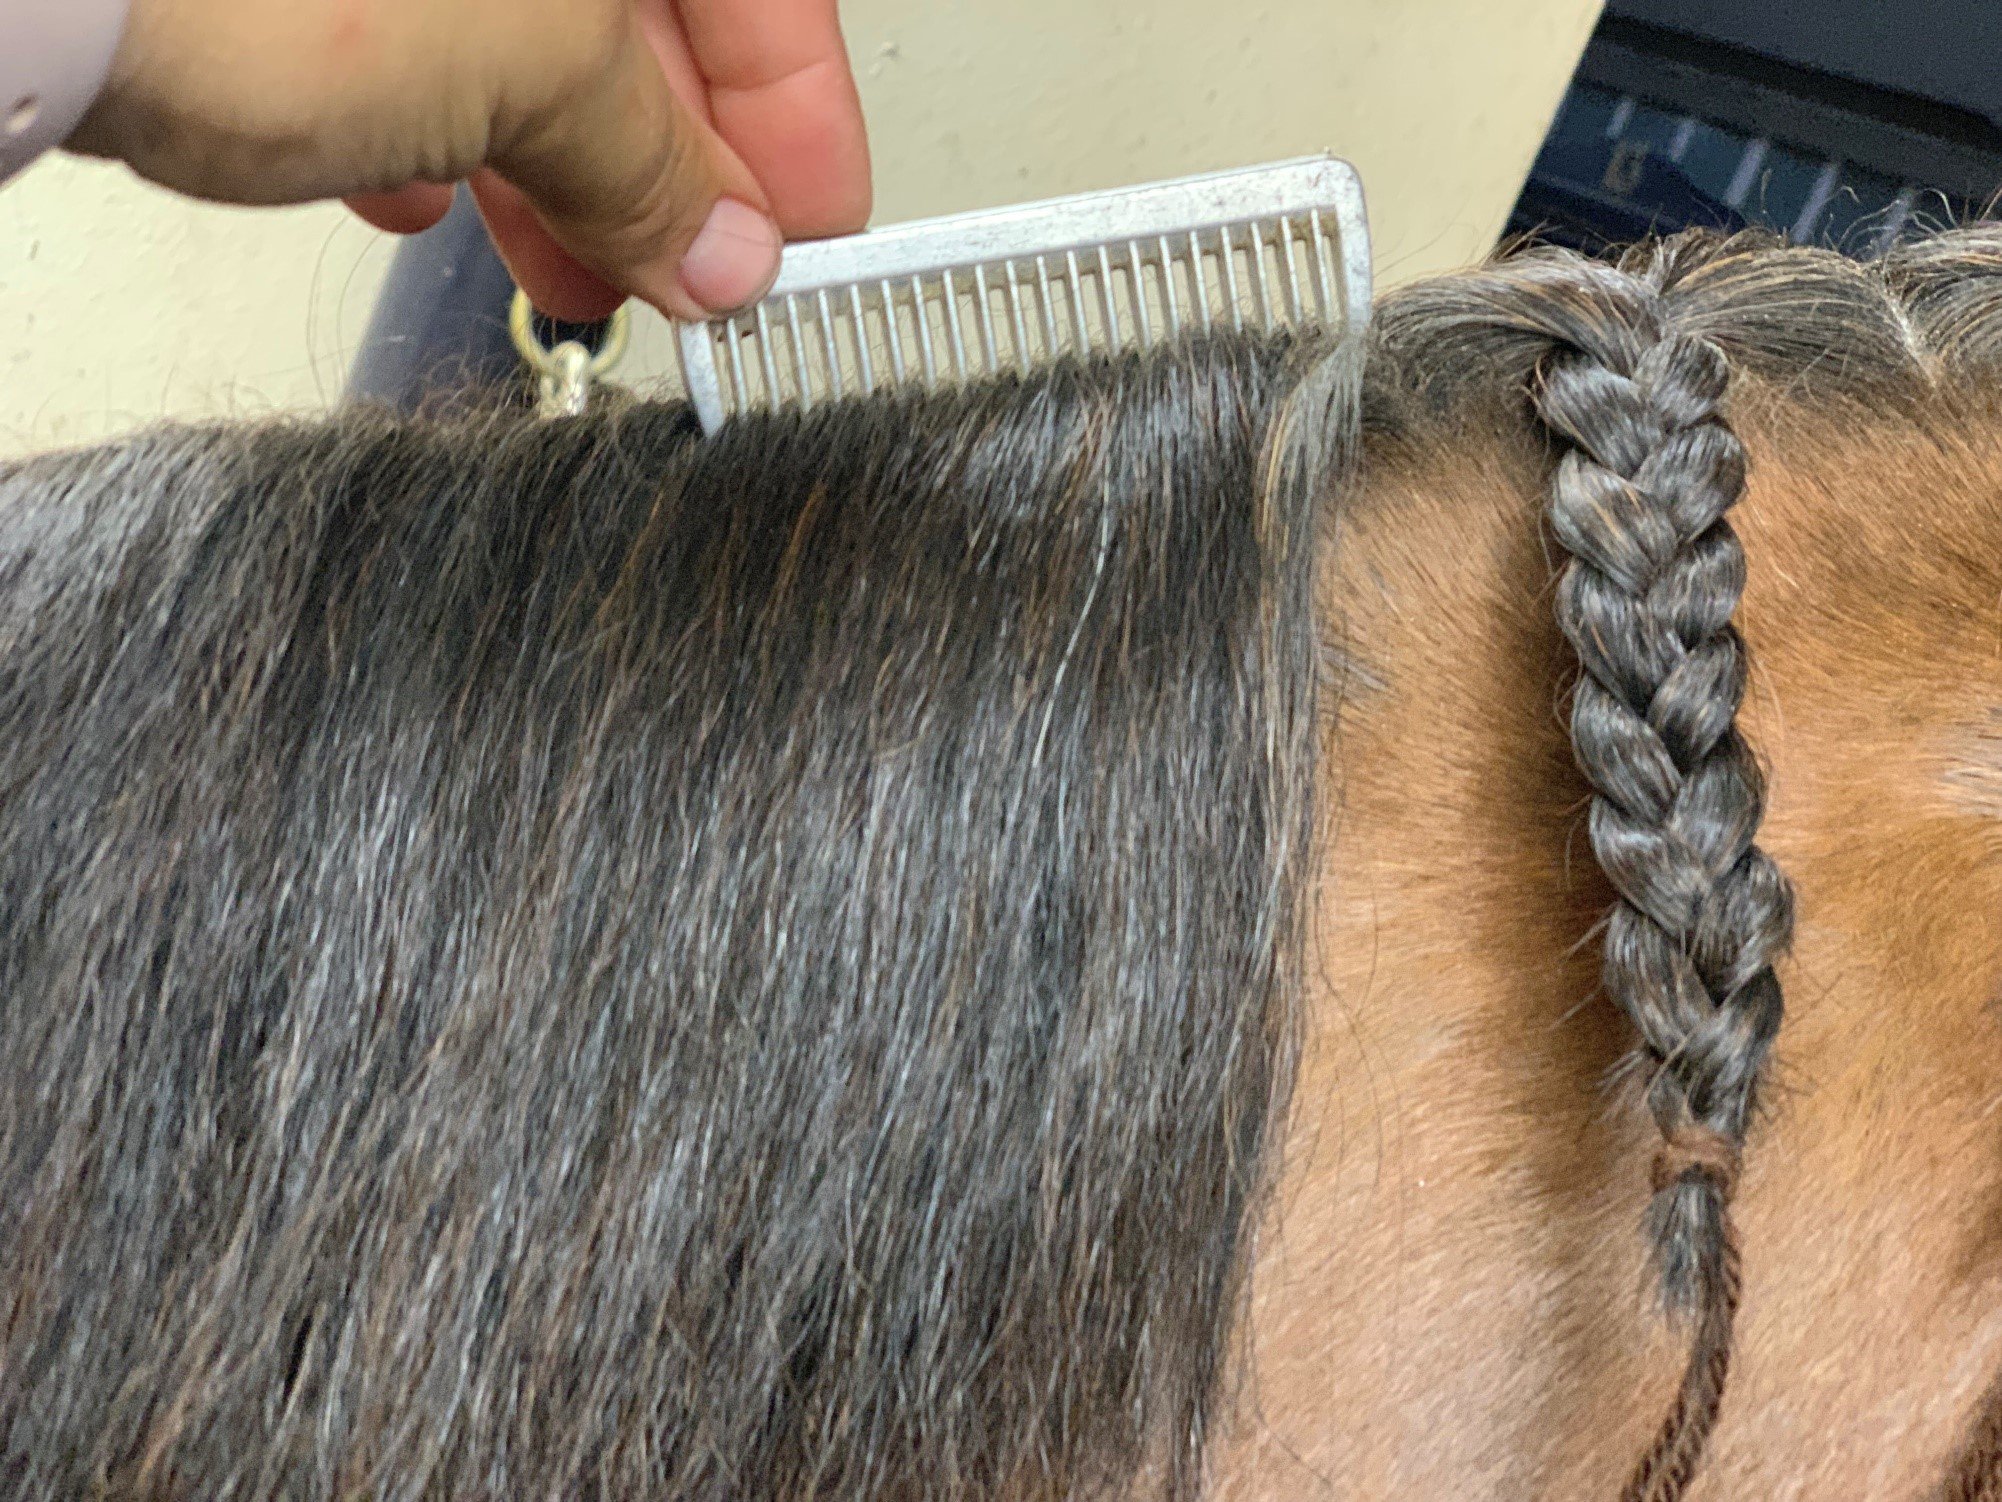
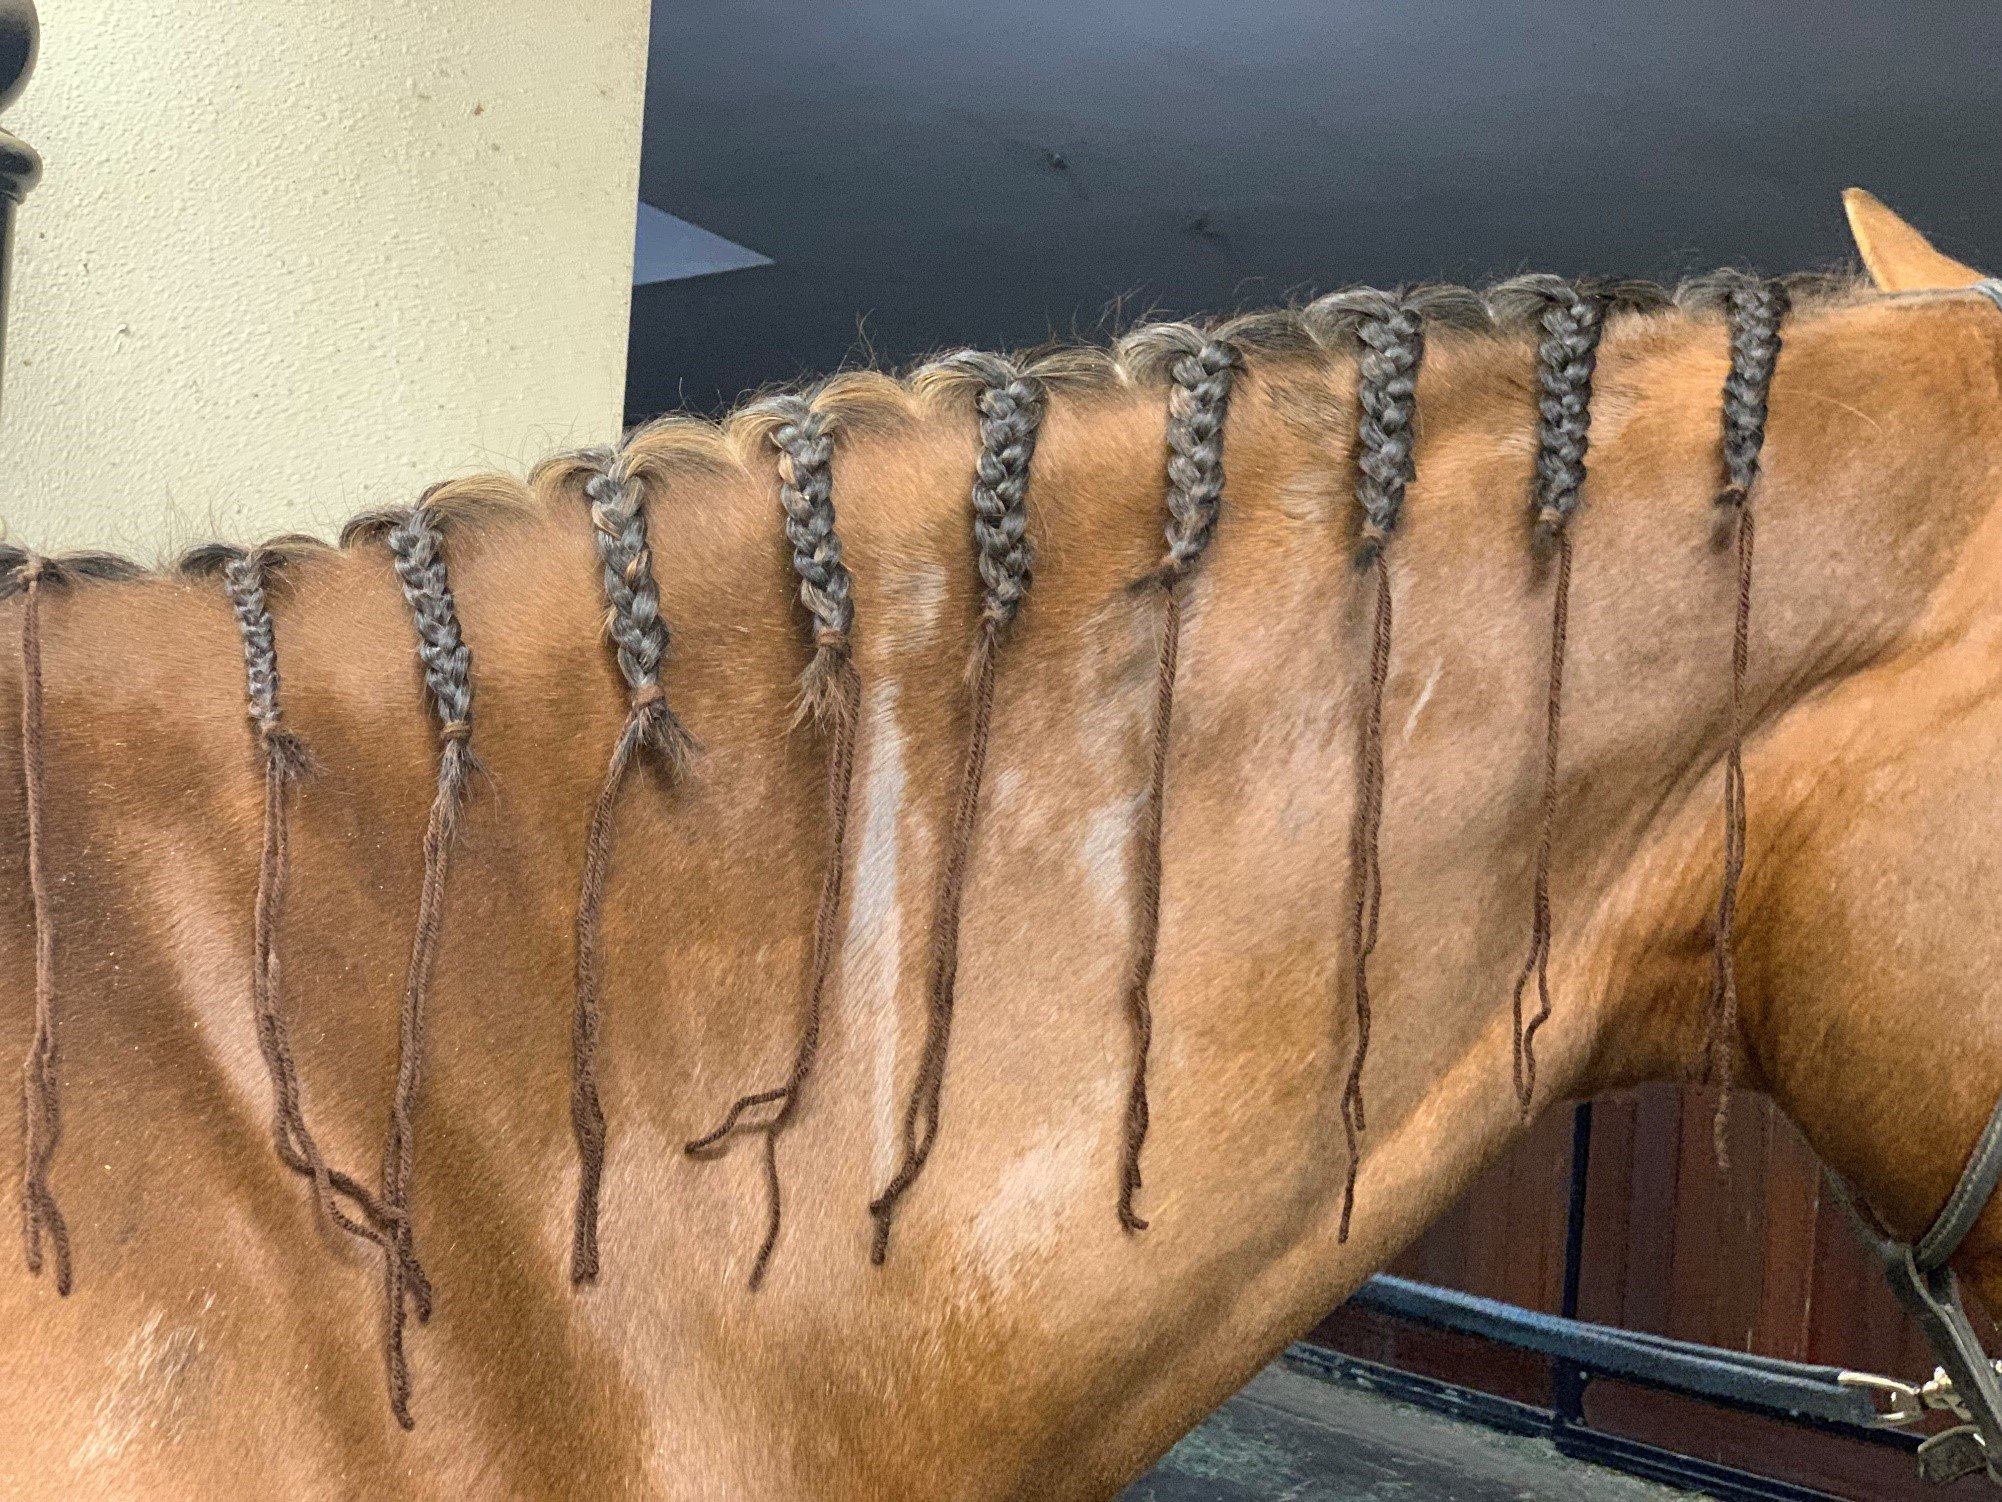
Step 2: Wet the hair with spray of choice and braid the hair down placing the yarn folded in half into your braid about ½ or ¾ of the way down. A thicker mane will need the yard added in no later than ½ so it can have a good anchor for the thickness of the mane. Braid as far down as possible and tie the braid off using the yarn with a knot. You can continue to do this process to the entire mane. I finish the entire process on groups of 3-5 braids at a time so I am going up and down the stool the least amount of times. When braiding 30 horses a night you learn some time and fatigue saving tips!

 Step 3: This is where things start getting serious. First trim the ends off all the yarn tails so they’re even and easily thread onto the yarn needle.
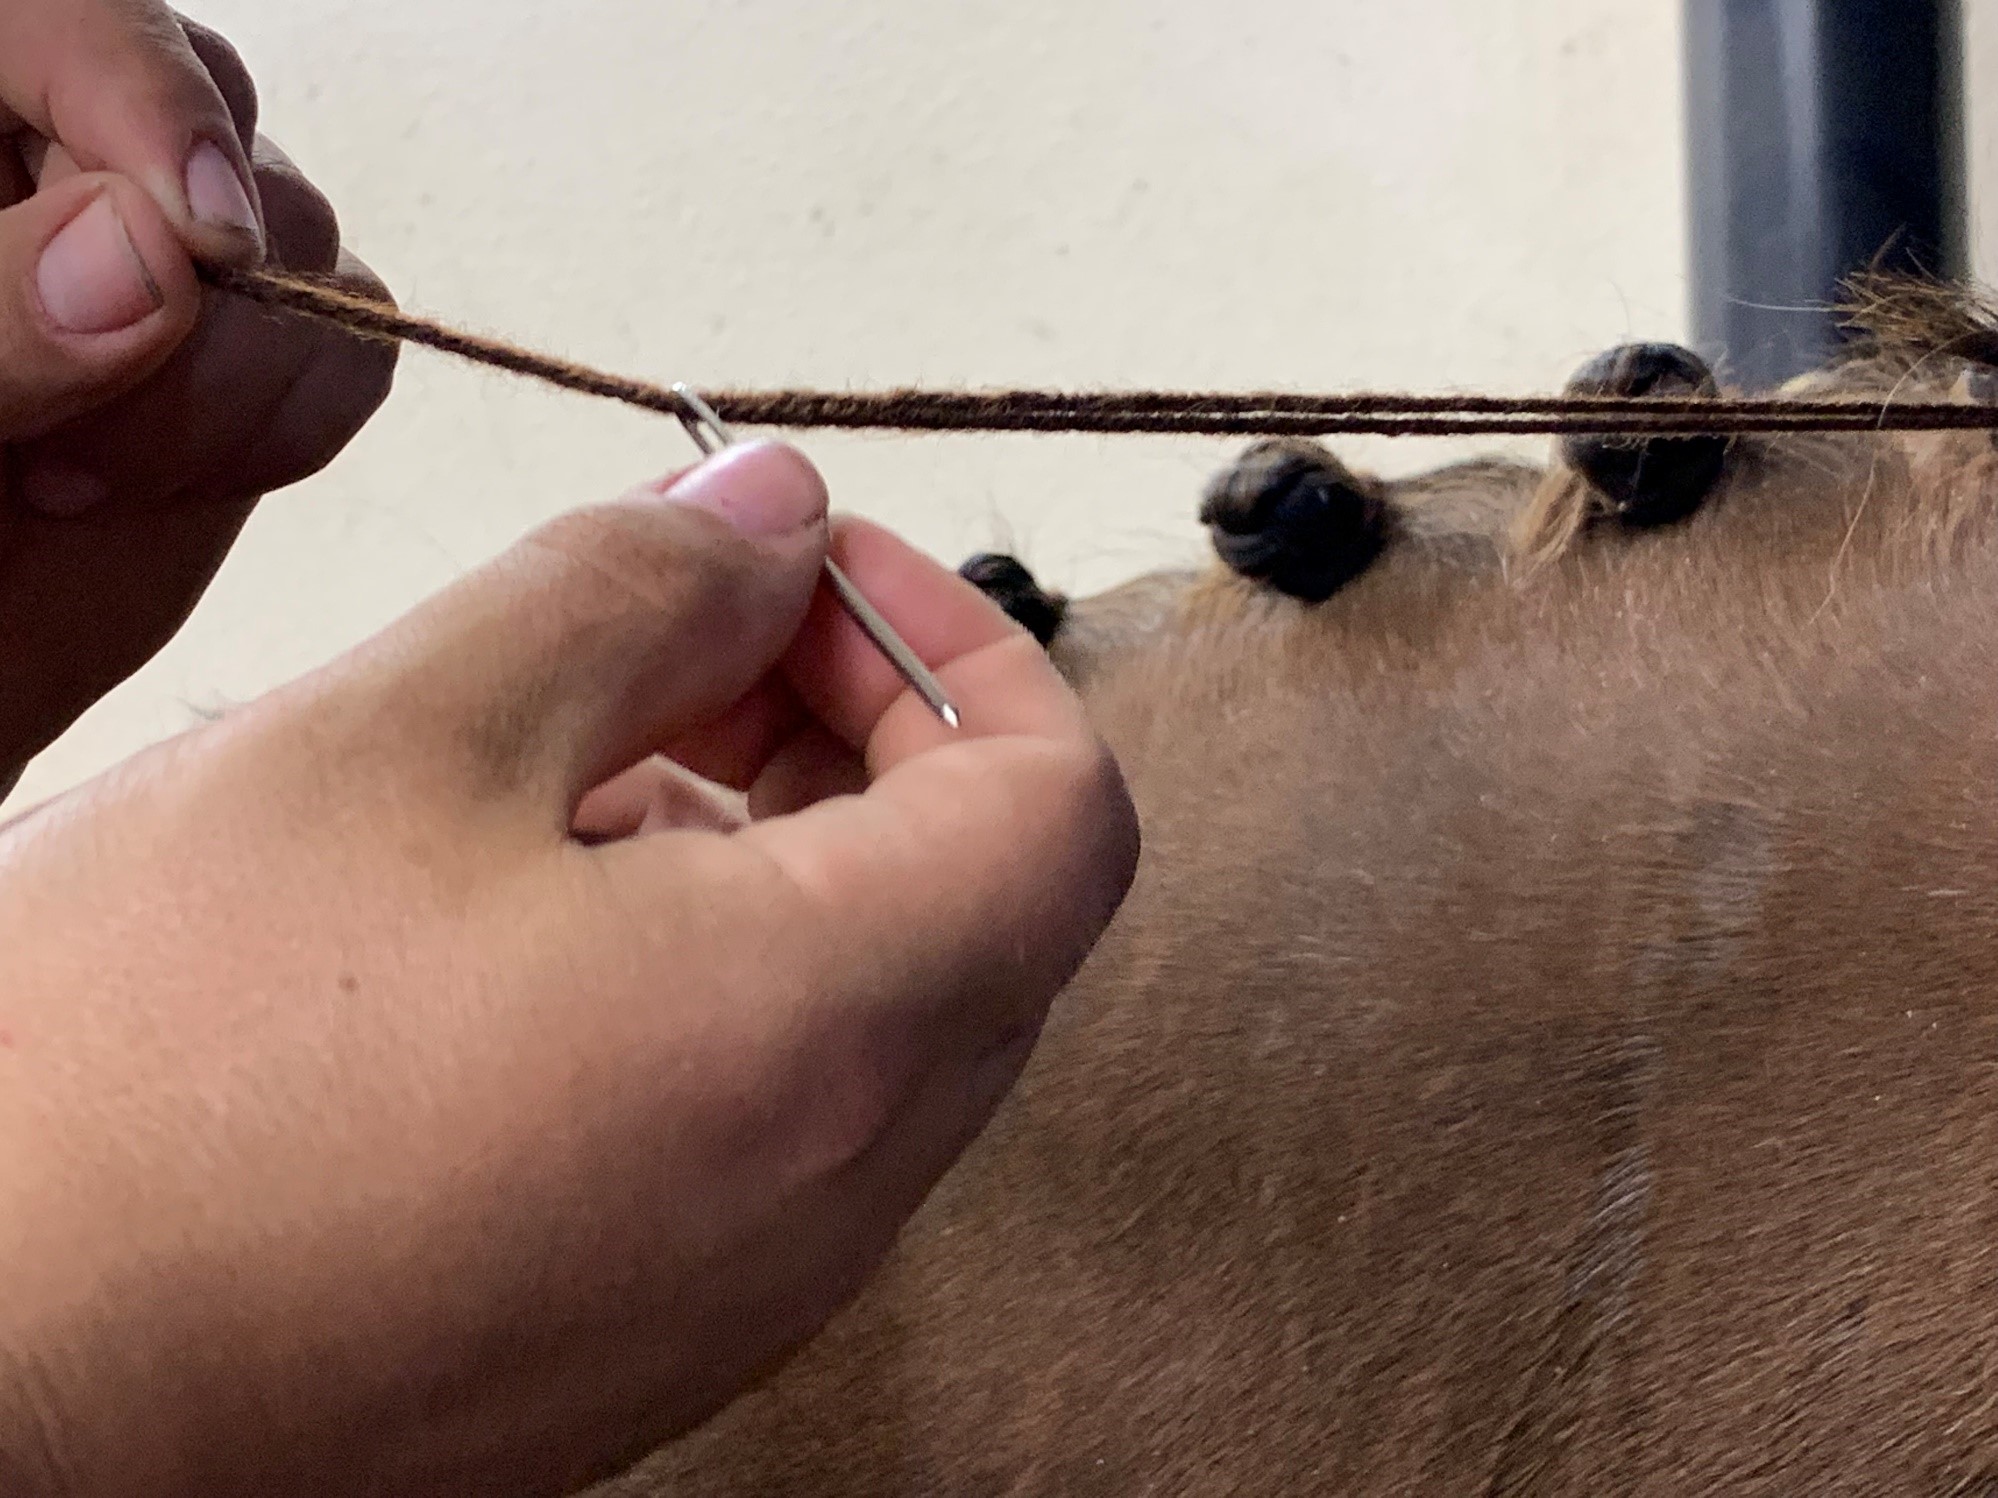 Step 4: After yarn is threaded onto the needle push needle through mane at the neck and pull yarn through to the other side. Do not pull the tail of the braid through.
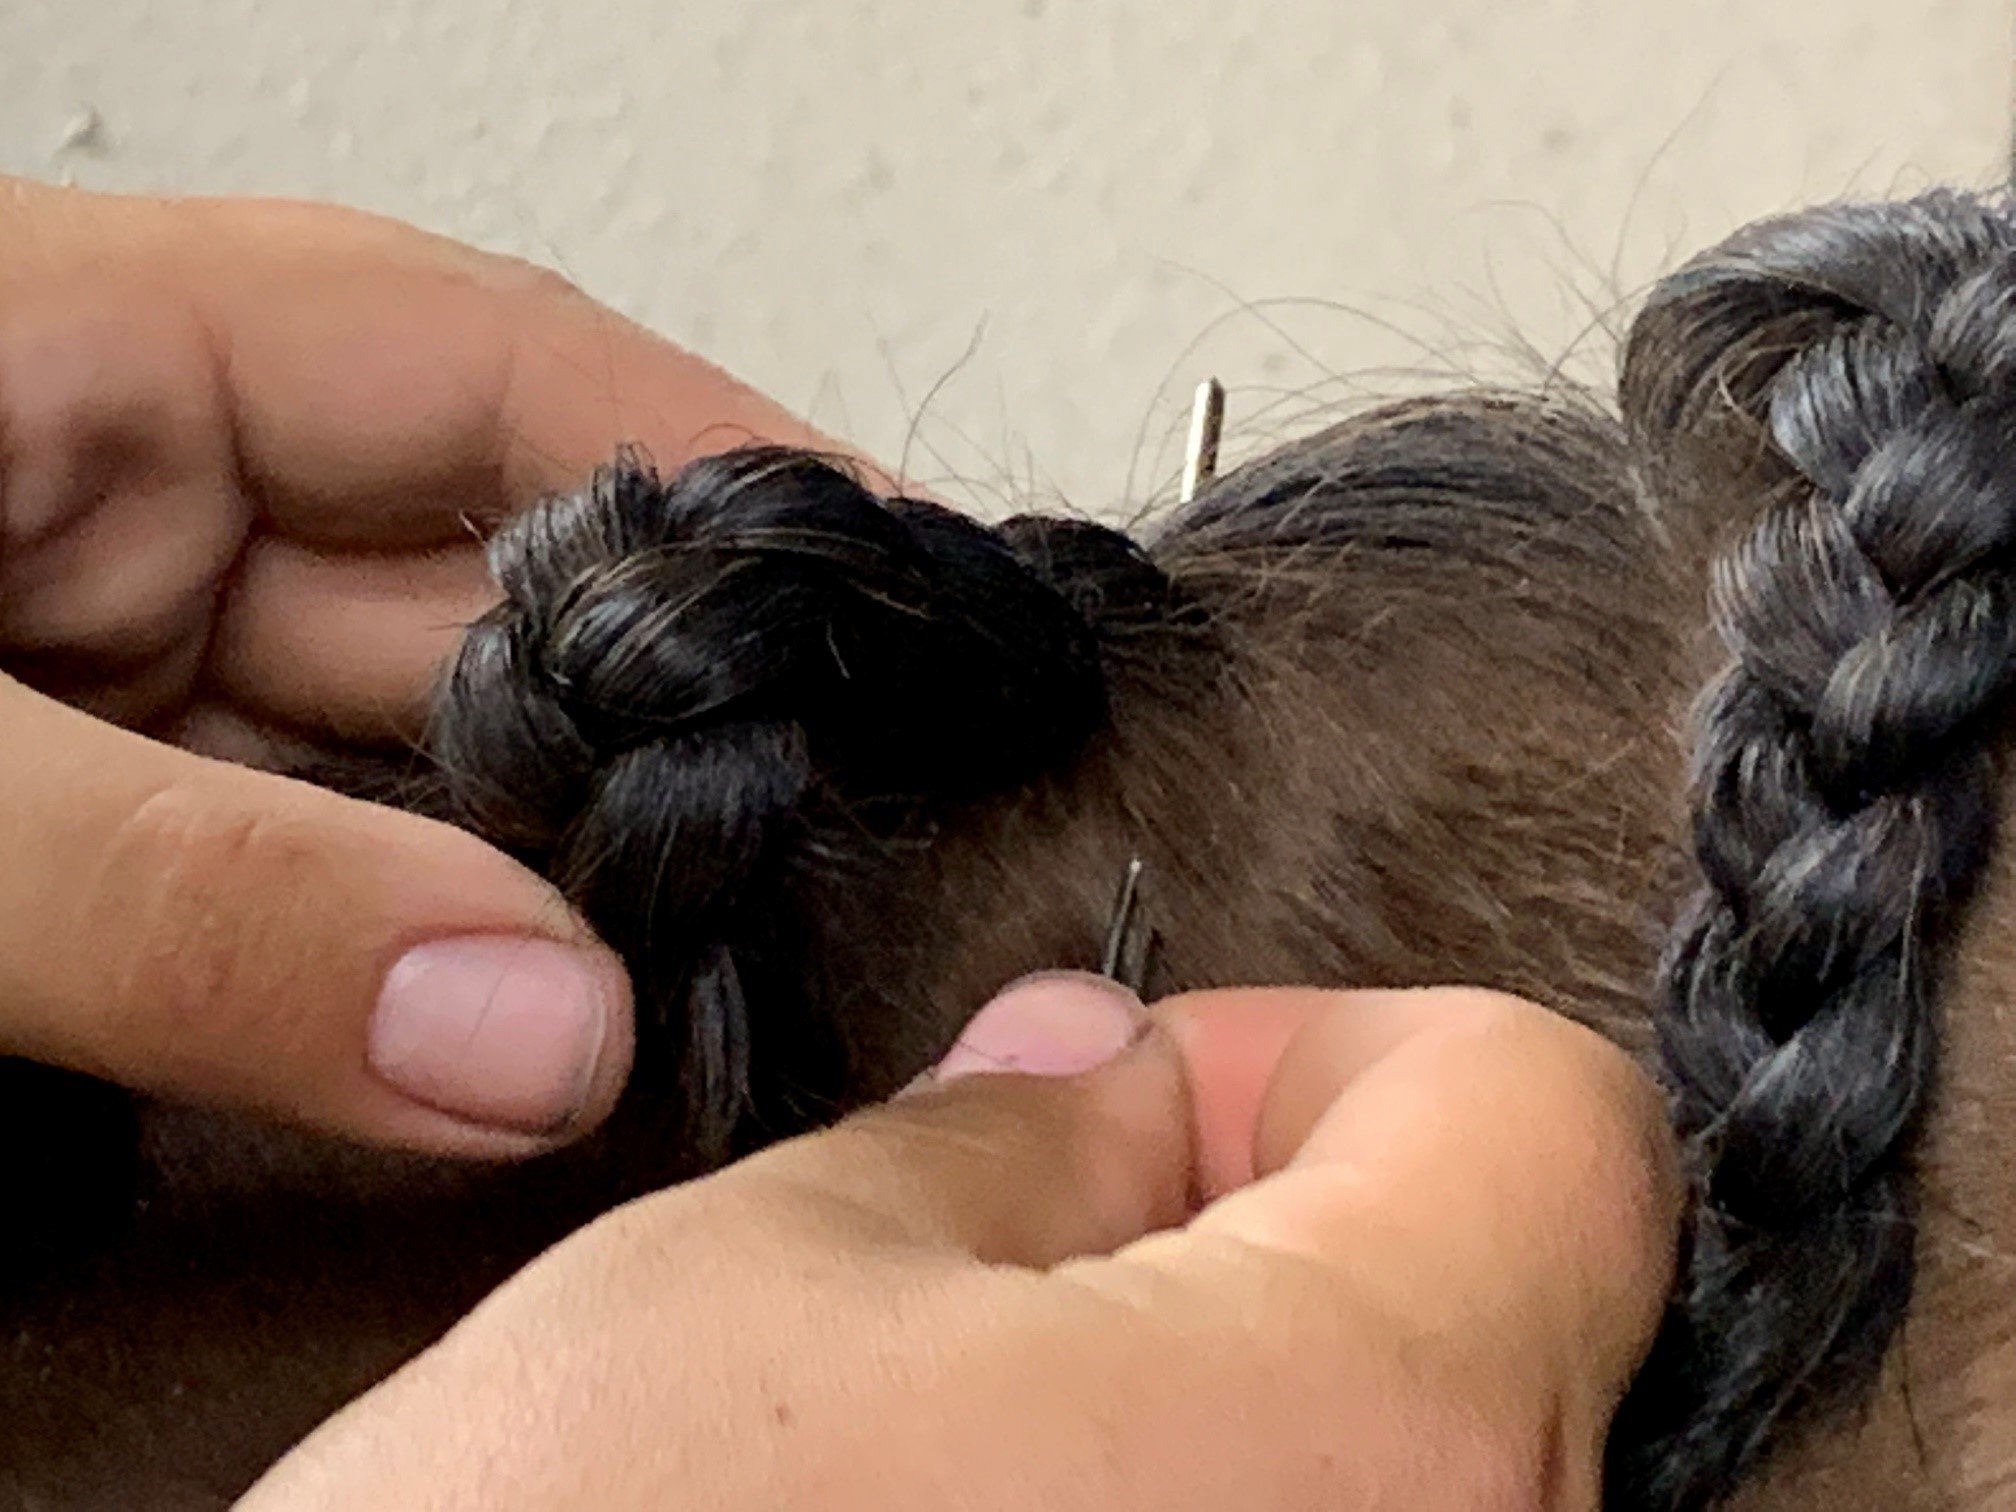
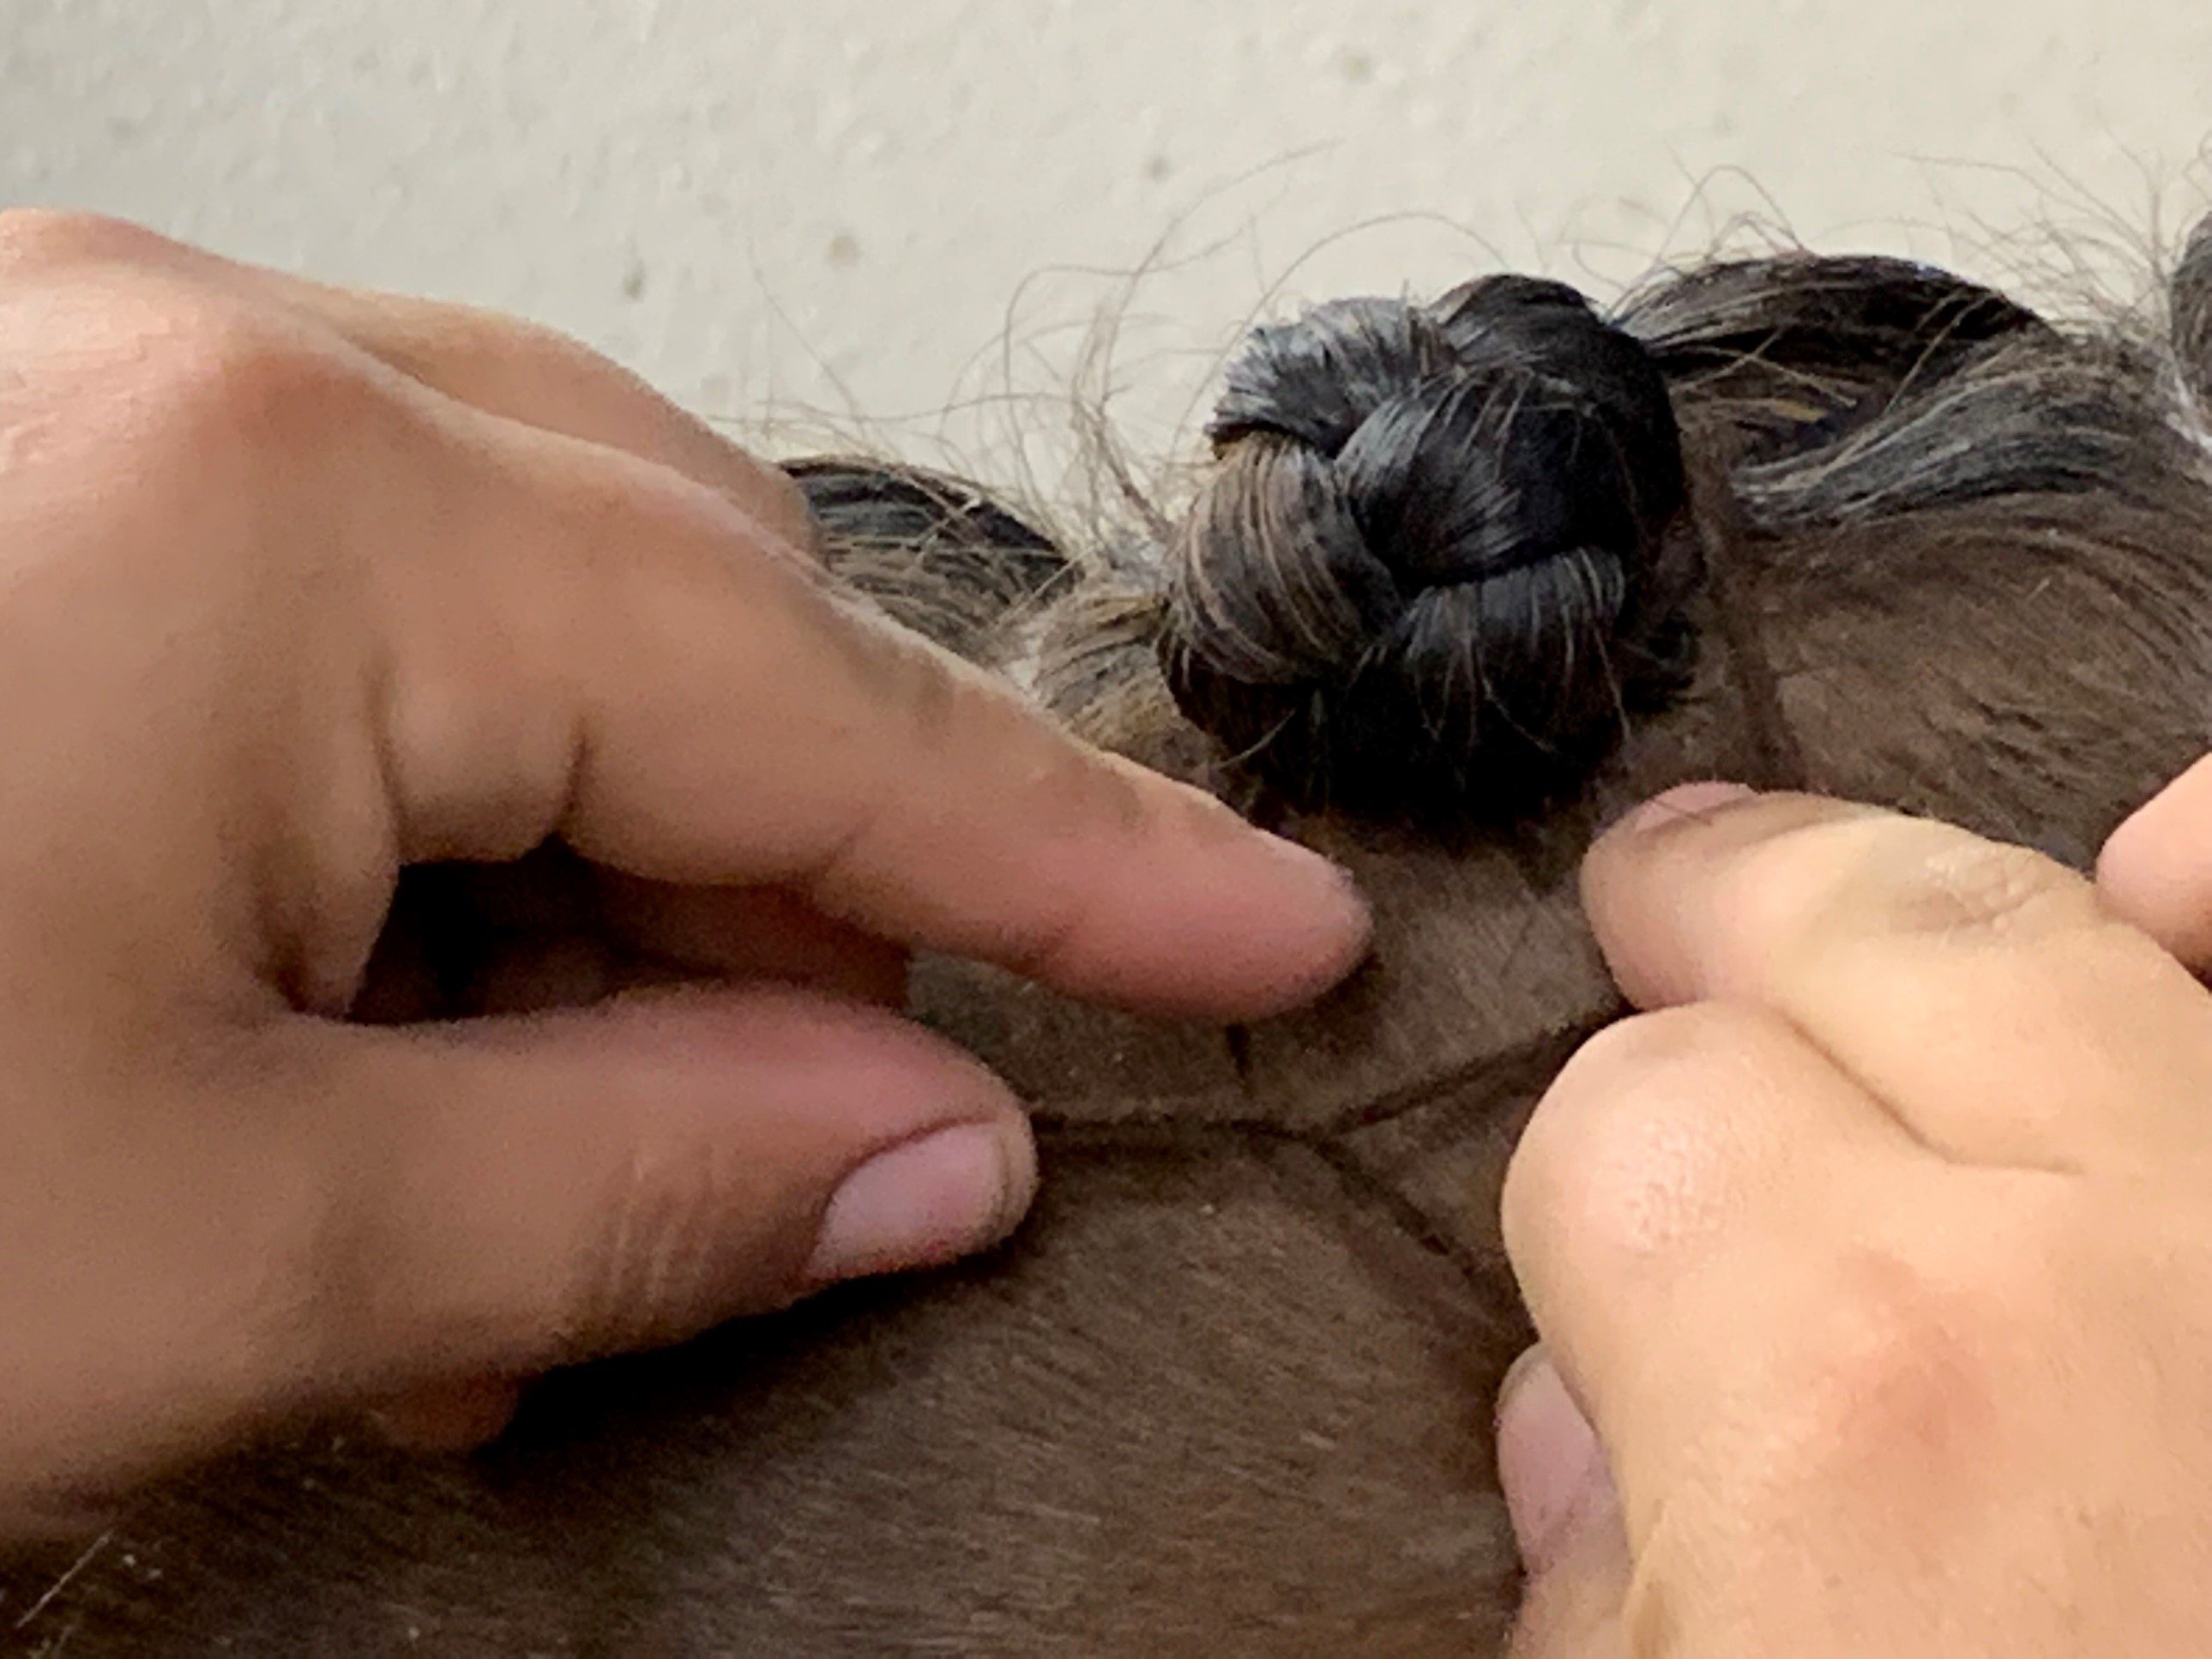
 Step 5: Fold the braid in half again by taking the bottom of the already folded braid and tucking it up to the neck underneath the braid, this creates the button. Holding the button against the neck bring yarn from the back around the outside of the braid and sew through bottom of button, pull through to back and repeat on opposite side. This lays the hair down beside the braid for a very clean and tidy look. If you want fluffier, scallop type braids you can just sew back and forth through the button and not go around the sides.

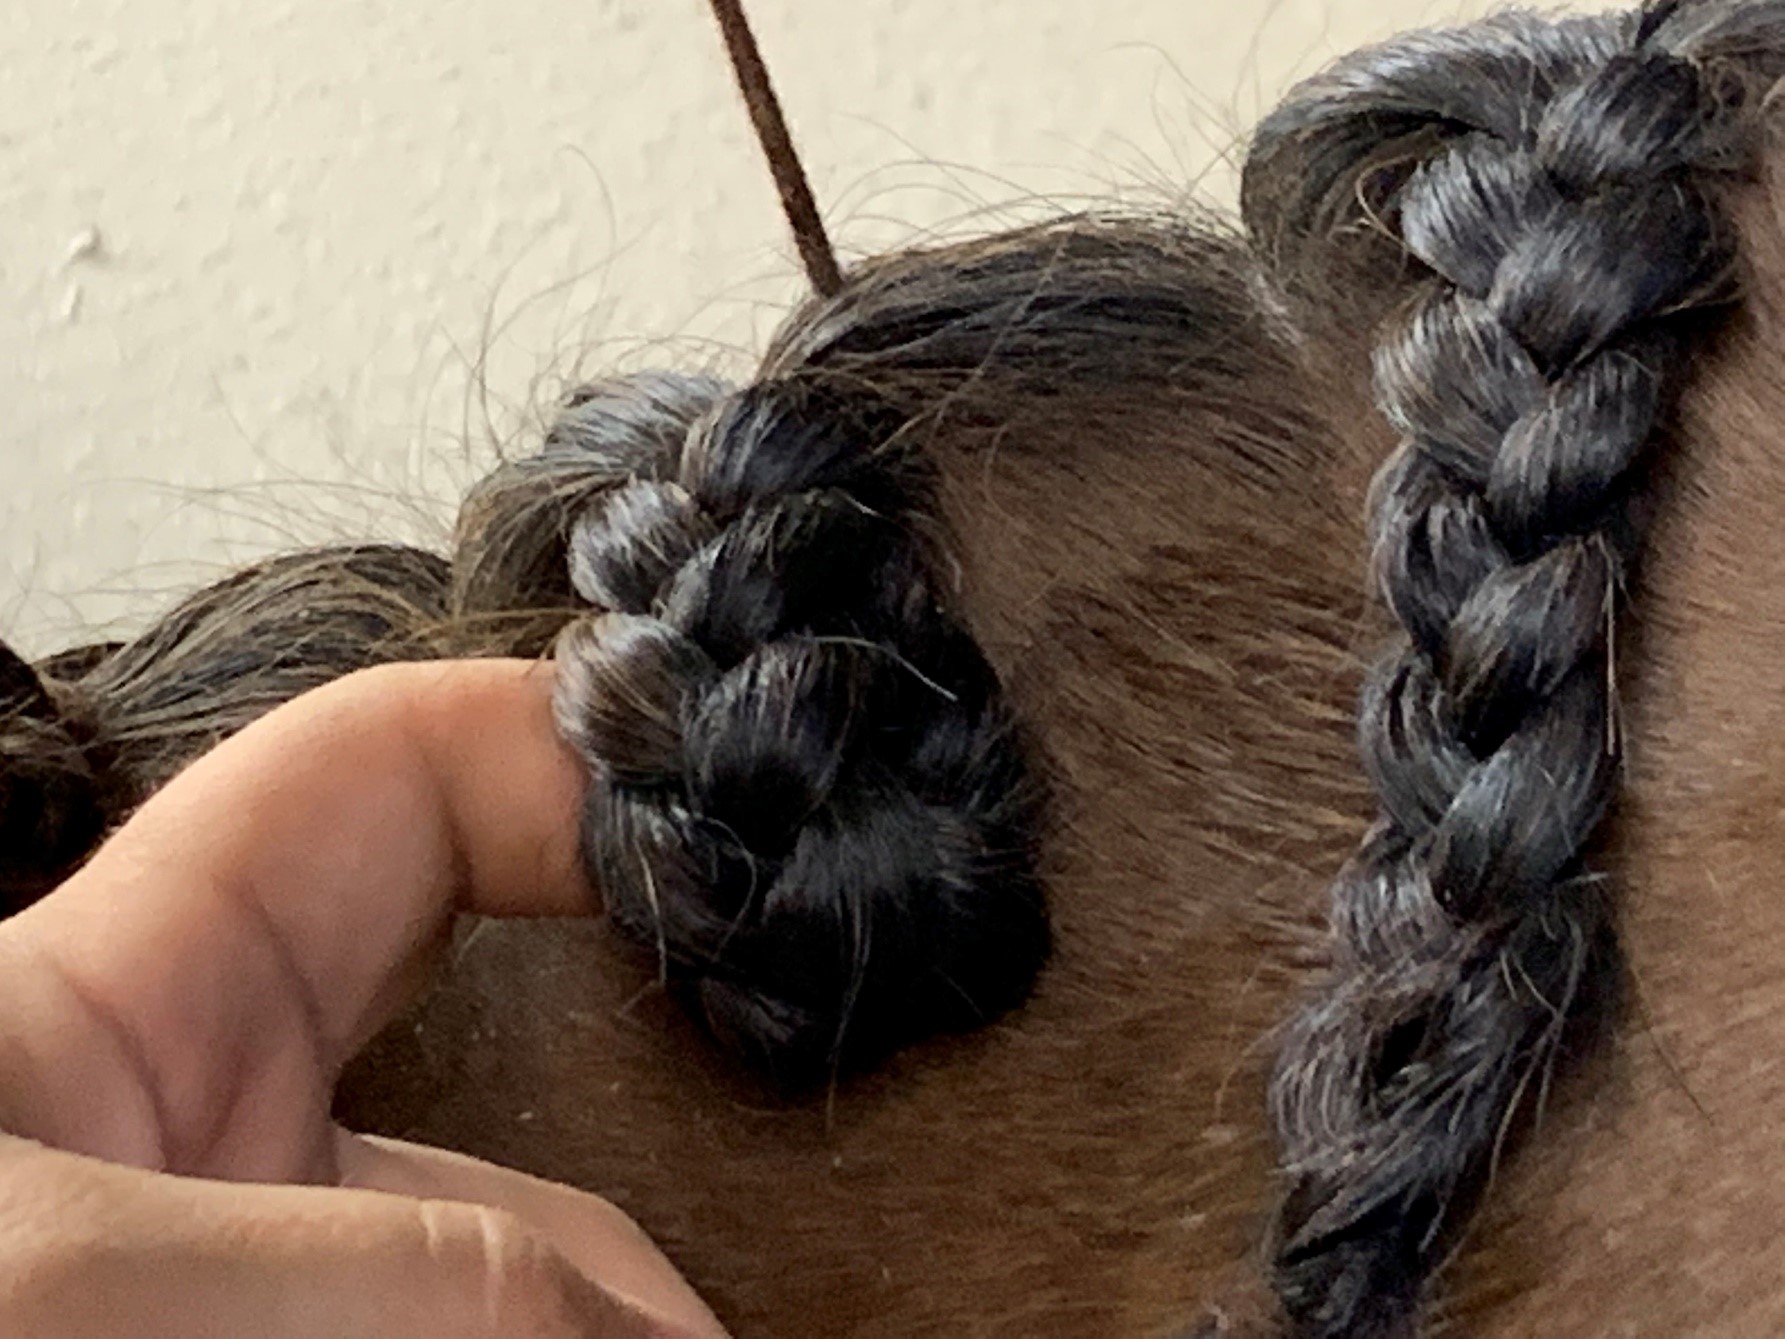
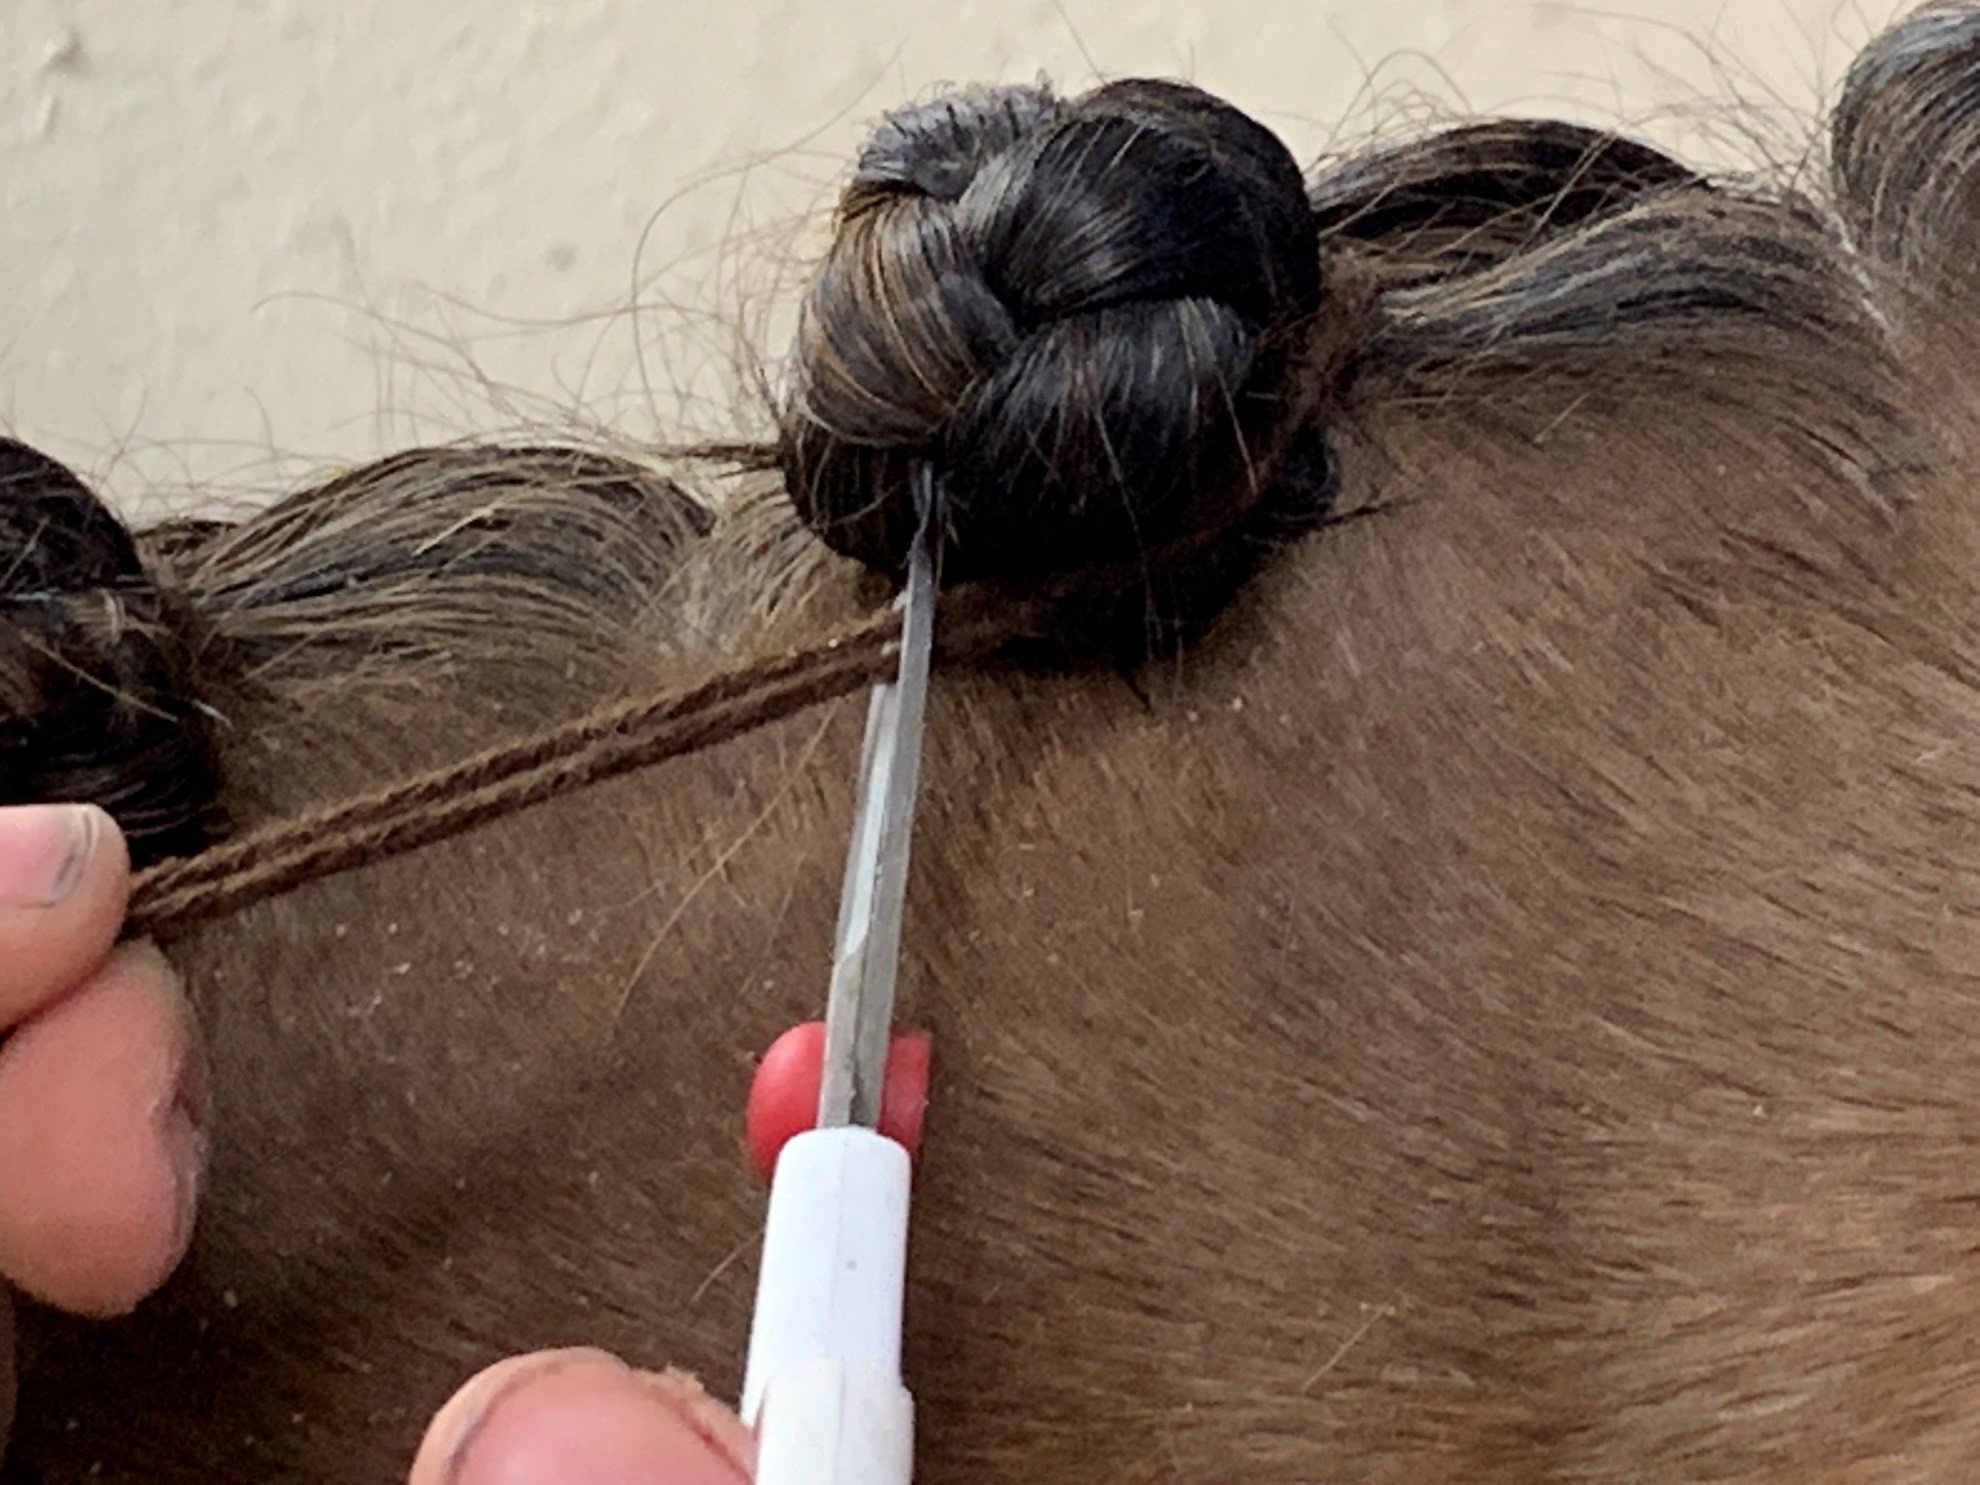
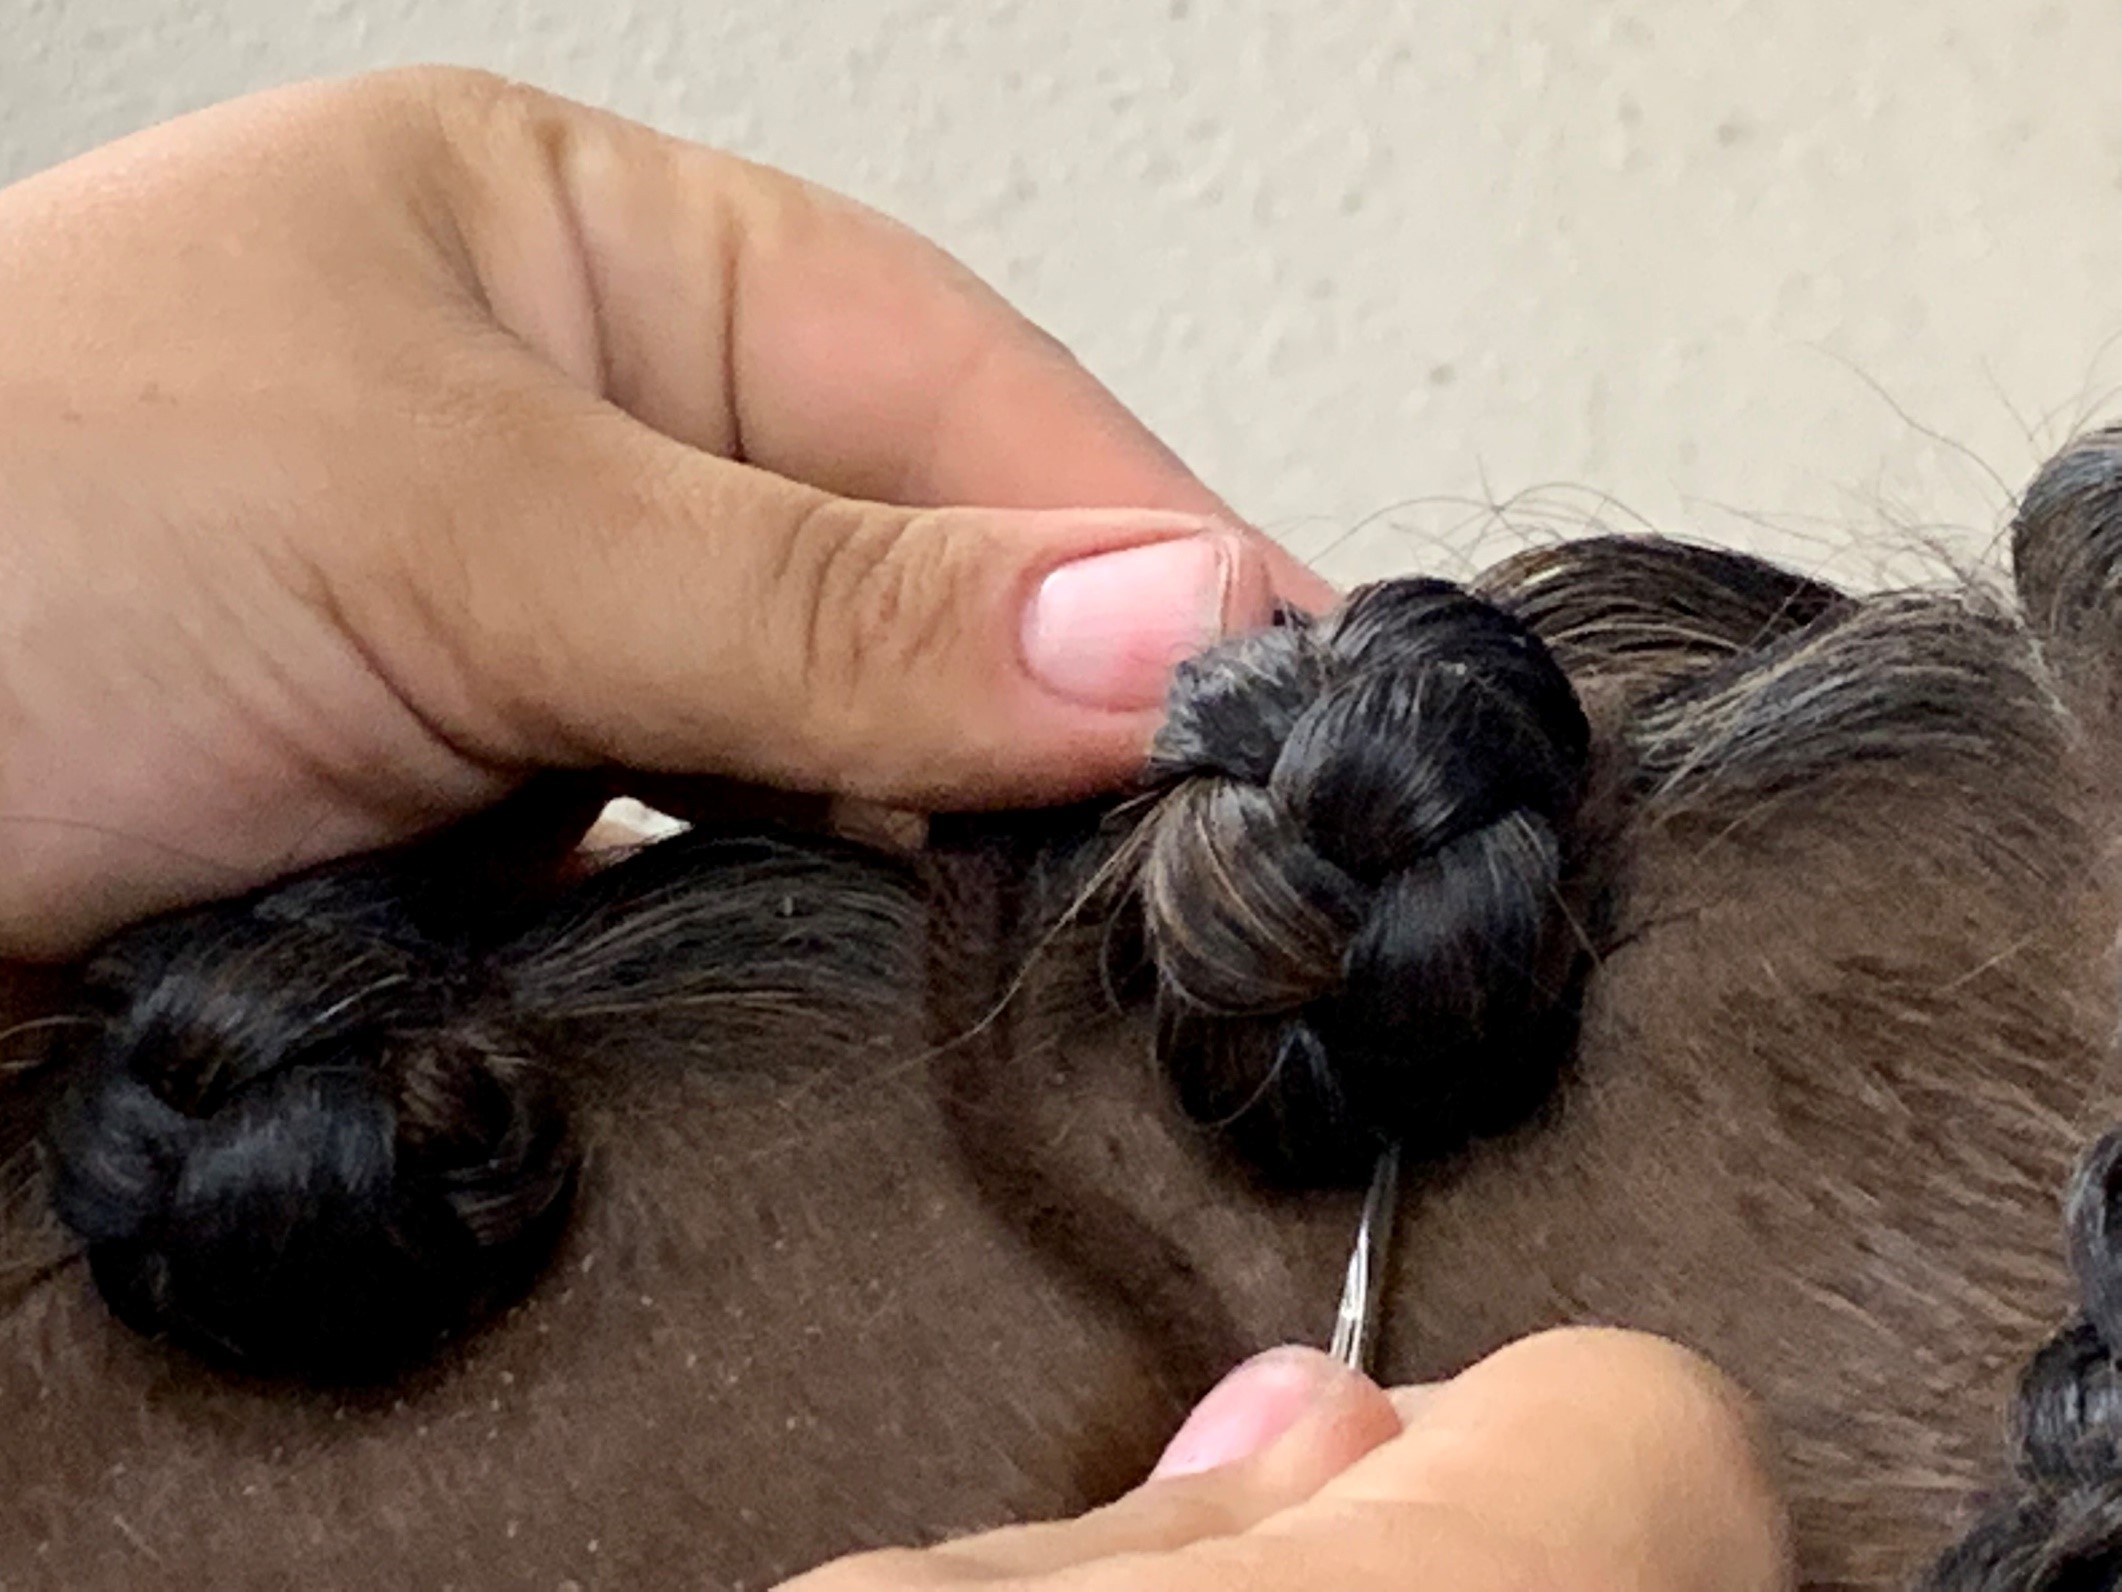 Step 6: Once you’ve secured your button by sewing around it 2-3 times each side, take the needle off the thread and tie the yarn ends into a tight not around the button at the base of the neck. You can do this 2-3 times. You will see the hairs lay down even more with a very clean, tight look. Lastly, cut tails off the knot making sure not to cut the knot itself, otherwise you will be starting that braid over. I know from experience…
 There you have it! Stay tuned for forelock braids, running buttons, dressage knots and Dutch fluffies!