 Equine


One of the most overlooked aspects of grooming your horse is cleaning & taking proper care of your grooming tools. It’s something that we almost all take for granted. As long as our horse is still SEMI clean most of the time & there are no underlying skin issues – cleaning your grooming tools doesn’t seem like a priority.
And I get it. We are all busy. Sometimes it’s hard enough to find time to spend with your horse, let alone do a deep clean of all your grooming supplies.
But cleaning your grooming tools doesn’t have to be time consuming or difficult. You AND your horse will be so grateful that you did.
Why Should I Clean My Grooming Tools?
You don’t wash your face with a dirty towel every night do you? Or brush your hair with a comb that is covered in dust & manure? It would be unsanitary & counterproductive, right?
Same thing with your horse’s grooming tools & brushes. Your horse lives in a barn or outdoors where there is dirt & mud & manure. He sometimes even sleeps on top of his own manure causing you to curse him for getting those pretty white socks of his all brown & green!
When you use your brushes to clean your horse, a lot of that dirt & gunk is transferred to your brushes. Stiff bristled brushes & soft body brushes can become especially grimy because the dirt & hair can begin to settle deep into the bottom of the brush & it’s difficult to get out.
It’s especially important to keep your brushes clean if your horse has a skin condition like rain rot or scratches. You don’t want to make the skin condition worse by rubbing dirt on already sensitive skin. And you definitely don’t want to transfer any skin funk to other horses. (You should ALWAYS use your own grooming tools. Don’t share between horses to avoid spreading skin conditions like rain rot which is contagious.)
Bottom line – clean your grooming tools because it’s good for your horse & overall more sanitary. There’s no point in grooming a dirty horse with dirty brushes. I recommend cleaning your grooming tools every one-two weeks depending on the season. I definitely clean mine more often during mud season aka Spring time!
 So fresh. So clean.
How To Clean Your Grooming Tools
Cleaning your grooming tools & brushes doesn’t have to be difficult. You really just need a bucket, dish soap & a towel.
Fill a bucket or sink with water (warm water if you have it but not necessary) & add antibacterial dish soap.
Before you toss your brushes in the water, run your curry comb over the bristles of your stiff & soft brush to loosen up some of the dirt & grime.
Also remove any buildup of hair from your horse’s hair brush or any of your supplies.
Submerge your brushes into the soapy water & continue to run the curry comb or your hand over the bristles of your stiff brush & soft brush to thoroughly clean. Make sure you scrub your curry comb & horse’s hair brush as well. If you have grooming gloves then they can be washed along with the rest of your grooming tools.
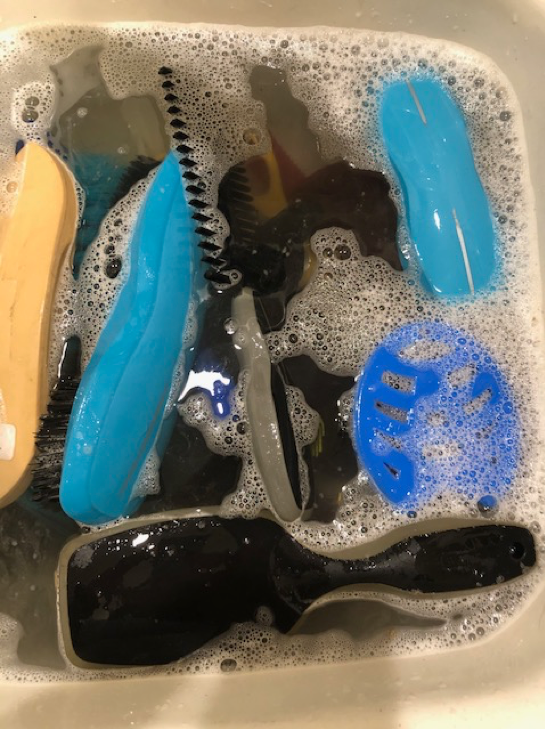 All of my brushes are submerged in warm, soapy water. I scrub all of them using my curry comb
to remove all dirt, dust & hair.
Once all of your brushes are clean make sure to rinse them thoroughly until no soap remains.
You can let them dry anywhere that won’t be in the way. I like to lay a towel out & place all of my brushes there to let them dry. If it’s a warm & sunny day then putting them in the sun will help them dry faster.
Lay your bristled brushes bristle side down as you are letting them dry. Letting water accumulate in the bristles will cause the bristles to come loose & your brush will begin to deteriorate.
Before you put your brushes back in your grooming carrier, make sure to wash it as well! You don’t want all of your hard work to go to waste by putting clean brushes in a dirty bucket or bag.
I use this amazing Wahl grooming bag, which I love because it’s large enough to hold all of my supplies & it has pockets to hold things like bands, hoof picks & horse treats. I typically throw this bag in my wash machine at home for a deep clean & then lay it out to dry with my brushes.
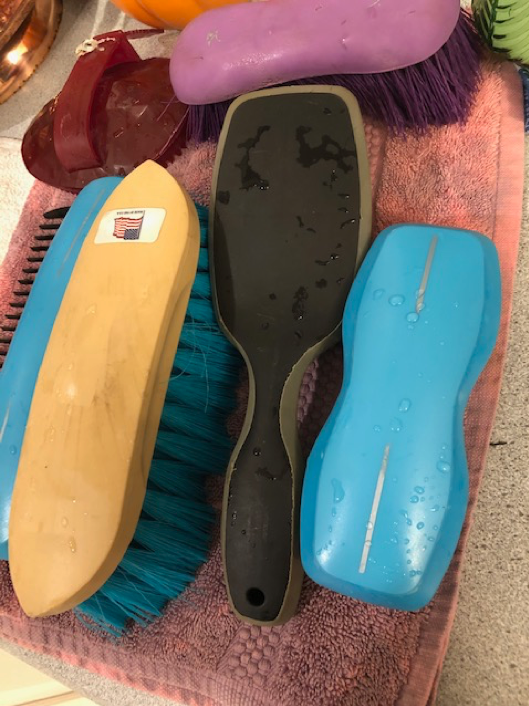 Lay your brushes bristle side down on a towel to dry. Your brushes are ready to get dirty again!
But You’re Not Done Yet….
Clean brushes & grooming supplies are SO important when you want to keep your horse clean & his coat shiny & healthy but you can’t forget about your riding tack. Saddle pads get hairy, sweaty & smelly with regular use & sometimes after just one use depending on how dirty your horse is & how much he sweats during your ride.
This also includes polo wraps or boots! You need to wash them regularly.
You don’t like to wear smelly, dirty work out clothes, do you!? Neither does your horse. And all of that sweat, dirt & grime can harbor bacteria or eventually cause sores on your horse if it becomes too stiff or dirty.
How To Keep Your Saddle Pads Clean
For everyday saddle pads, it’s really easy to just throw them in the washer & dryer & call it a day. It’s typically the easiest way to keep your saddle pads clean. But keep in mind that if your saddle pad is extremely dirty or full of hair (shedding season, anyone?!) then do yourself & your washer a favor by brushing most of the hair off before you throw it straight in the wash. If your barn has a hose or wash rack, you can also hose off your saddle pads there to get the extra hair off. Alternatively, throw your saddle pad in the dryer for 5-10 minutes – the lint collector will remove most of the hair & then you can throw it in the wash.
An important thing to remember when washing your saddle pads & even your polo wraps, riding gloves & sports boots is to use a mild detergent. Many store bought detergents are full of harsh chemicals & fragrances that could be irritating to your horse. Your best bet is to purchase an all-natural or organic brand of detergent for your riding gear.
What to NEVER put in your washing machine – leather or sheepskin! Purchase a leather or sheepskin laundry solution or cleaner for these items specifically.
To keep Western saddle pads fresh, I recommend using a sheet or pad underneath to avoid getting your saddle pad really dirty as Western pads are much more difficult to clean. You can follow the same washing instructions for the sheet or pad.
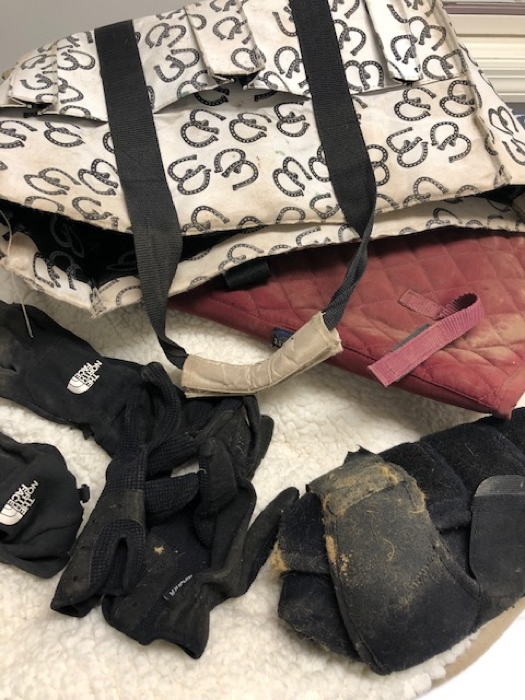 Saddle pad, grooming bag, riding gloves, winter barn gloves & sport boots are ready to go in the wash!
You may find that your dryer is damaging to your saddle pads. After a lot of cycles through the washer & the dryer, I definitely find my saddle pads start losing their shape & falling apart. If this is the case then simply let them air dry in the shade (the sun can bleach colored pads).
Now that you have clean brushes, grooming supplies & saddle pads – don’t forget to regularly clean your tack. Ideally, this should really be done after every ride. I know, I know….it’s hard to make time for all of these extra tasks on top of riding your horse & caring for him. But taking good care of your tack ensures that your tack stays in tip top shape without the risk of breakage, which is dangerous. Seriously, no one wants a rein or stirrup leather to break 3 strides out from an oxer.
The basics of keeping your tack clean is simply using a soft brush or soft towel to remove dust from the surface as well as in between the creases & under the flaps.
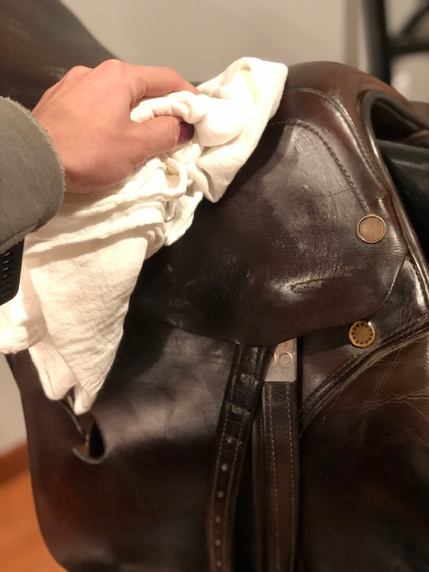 Making sure the saddle is cleared of dust on the surface & underneath the flaps.
Definitely follow the manufacturer instructions when it comes to cleaning your tack but it’s typically a pretty safe bet to purchase a leather cleaner like saddle soap or glycerin soap. You can use a sea sponge to work into your saddle but I prefer using make up sponges! This is also the perfect time to completely check over your tack to make sure it is all in working condition without any breaks or tears. I also use a “stickier” conditioner on my jumping saddle which makes it a bit tackier & easier to stay on! Which is important! It’s an older model so it can get slippery without proper cleaning & conditioning!
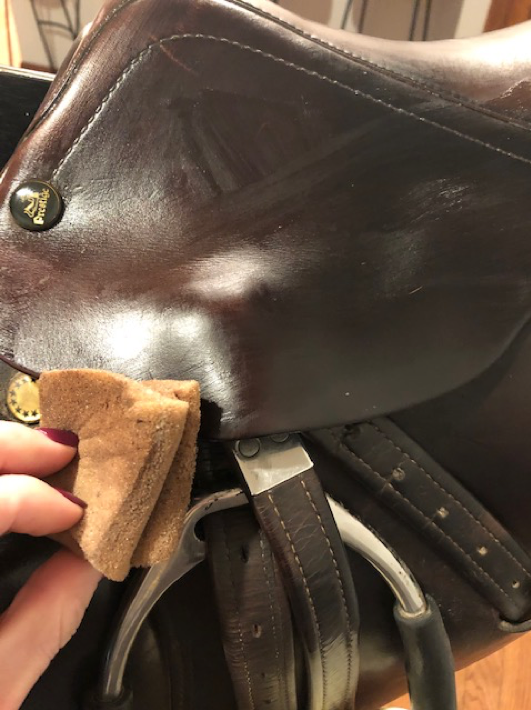 I like to use make up sponges to clean my saddle.
Sometimes those hard to reach places – in the creases, under the flaps & in the nooks & crannies are the dirtiest part of your tack; which makes sense because it is the most difficult to reach. I use a toothbrush to really get into those hard to reach areas & get it nice & squeaky clean.
Other parts of your tack, like your stirrup irons, the metal parts of your spurs & nylon halters – throw those babies in the dishwasher! They will come out good as new.
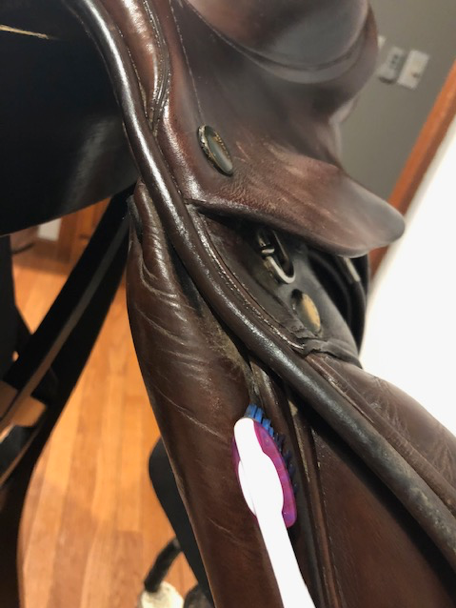 Using a toothbrush to get in between the creases & those hard to reach areas.
There you have it. Your grooming tools, brushes, saddle pads & tack are clean as a whistle! Feels good, doesn’t it?!